CSS3
昨日、HTML5について書いたので、
今日は関連の深いCSS3についてかいてみようかと思います。
CSS3とは
CSSは、Cascading Style Sheets (カスケーディング・スタイル・シート)の略で、HTMLの文書情報にレイアウトや、文字色やエレメントなどの装飾といったヴィジュアル要素を指定する技術です。CSS3はその最新バージョンとなります。
CSS3ではCSS2より新しく追加されたプロパティやセレクタによって、従来より表現の幅が格段に広がりました。
CSS3は、まだ策定中の技術ではあるものの、ブラウザでの実装が先行して進められており、特に、近年市場が急速に拡大しているスマートフォンでのブラウジングにおいては、実質的にスタンダード使用されています。
従来のCSSと何が違う?
基本的な部分は何も変わりません。CSSにはバージョンを示す記述が存在しないため、従来のCSSと混在した記述が可能です。
CSS3で追加された新しい仕様のセレクタやプロパティを記述し、CSS3をサポートしているブラウザで閲覧することで記述通りの表示が可能です。
CSS3で追加されたセレクタの例
| 機能 | 記述例 | 意味 |
|---|---|---|
| Begins with | div[foo^=bar”]{ } | foo属性の値がbarで始まっているdiv要素 |
| End with | div[foo $=bar”]{ } | foo属性の値がbarで終っているdiv要素 |
| last-child | div:last-child{ } | 親要素の中で最後に登場するdiv要素 |
| nth-child | div:nth-child(n){ } | n番目のn要素 |
| nth-last-child | div:nth-last-child(n){ } | 後ろからn番目のdiv要素 |
| first-of-type | div:first-of-type{ } | 兄弟(並列)関係にあるもののうち最初のdiv要素 |
| last-of-type | div:last-of-type{ } | 兄弟(並列)関係にあるもののうち最後のdiv要素 |
| nth-of-type | div:nth-of-type(n){ } | 兄弟関係にあるもののうちn番目のdiv要素 |
| nth-last-of-type | div:nth-last-of-type(n){ } | 兄弟関係にあるもののうち後ろからn番目のdiv要素 |
| enabled | input:enabled{ } | 入力できる状態(有効)になっているinput要素 |
| disabled | input:disabled{ } | 入力できる状態(無効)になっているinput要素 |
| checked | input:checked{ } | チェックされた状態になっているラジオボタンやチェックボックス |
| target | div:target{ } | アンカーで飛んだ先のdiv要素 |
CSS3では多数の属性セレクタや疑似クラスなどが追加されました。これによって、「○○が●●の場合…」といった自由度の高い指定が可能になりました。
CSS3で追加されたプロパティの例
| 機能 | 記述例 | 意味 |
|---|---|---|
| グラデーション | div{background-image: linear-gradient (top,yellow.blue);} |
div要素の背景に上から下へと黄色から青色になるグラデーションを指定 |
| 変形(2D) | div{transform: rotate(180deg); } | div要素を180度回転 |
| 角丸 | div {border-radius: 10px;} |
div要素の四隅を半径10pxの角丸に |
| 透過 | div:{opacity:0.5; } | div要素を50%透過 |
| ボックスレイアウト | div{display:box; } | div要素の直下の子要素を横並びにする |
| ボックスシャドウ | div{box-shadow: 1px 1px 5px #000;} |
div要素の右1px、下1pxの位置に5pxのぼかしで黒の影を指定 |
| テキストシャドウ | div{text-shadow: 1px 1px 5px #000} |
div要素内の文字の右1px、下1pxの位置に5pxのぼかしで黒の影を指定 |
| 段組 | div{column-count:n; } | div要素の内容をn個の段組みにする |
| アニメーション | a{background:#000; color:#FFF; transition: background-color 1.0s ease; } a:hover {background:#00f;} |
a要素にマウスカーソルが乗ったときに、a要素の背景色を1秒間かけて白(#FFF)から青(#00F)に変化させる |
| 複数背景 | div{background-image:url(hoge.png), url(fuga.png)} |
div要素の背景にhoge.pngとfuga.pngを指定 |
CSS3では角丸やボックスシャドウ、グラデーション、アニメーションなど、様々なプロパティが追加されました。
今まで画像を使っていた装飾が、CSSの記述のみで手軽に実現できるようになりました。
下記はincrement といったプロパティを使って数値部分を独自にデザインしています。
リスト部分の数字のデザインはなかなか難しかったと個人的に記憶していますが、こうした方法でやれば思い通りのリストデザインが作れるんですね。

Rounded-shaped numbers

HTML
<ol class="rounded-list">
<li><a href="">List item</a></li>
<li><a href="">List item</a></li>
<li><a href="">List item</a>
<ol>
<li><a href="">List sub item</a></li>
<li><a href="">List sub item</a></li>
<li><a href="">List sub item</a></li>
</ol>
</li>
<li><a href="">List item</a></li>
<li><a href="">List item</a></li>
</ol>
CSS
ol {
    counter-reset: li; /* Initiate a counter */
    list-style: none; /* Remove default numbering */
    *list-style: decimal; /* Keep using default numbering for IE6/7 */
    font: 15px 'trebuchet MS', 'lucida sans';
    padding: 0;
    margin-bottom: 4em;
    text-shadow: 0 1px 0 rgba(255,255,255,.5);
}

ol ol {
    margin: 0 0 0 2em; /* Add some left margin for inner lists */
}
.rounded-list a{
    position: relative;
    display: block;
    padding: .4em .4em .4em 2em;
    *padding: .4em;
    margin: .5em 0;
    background: #ddd;
    color: #444;
    text-decoration: none;
    border-radius: .3em;
    transition: all .3s ease-out;
}

.rounded-list a:hover{
    background: #eee;
}

.rounded-list a:hover:before{
    transform: rotate(360deg);
}

.rounded-list a:before{
    content: counter(li);
    counter-increment: li;
    position: absolute;
    left: -1.3em;
    top: 50%;
    margin-top: -1.3em;
    background: #87ceeb;
    height: 2em;
    width: 2em;
    line-height: 2em;
    border: .3em solid #fff;
    text-align: center;
    font-weight: bold;
    border-radius: 2em;
    transition: all .3s ease-out;
}
Rectangle-shaped numbers

HTML
<ol class="rectangle-list">
<li><a href="">List item</a></li>
<li><a href="">List item</a></li>
<li><a href="">List item</a>
<ol>
<li><a href="">List sub item</a></li>
<li><a href="">List sub item</a></li>
<li><a href="">List sub item</a></li>
</ol>
</li>
<li><a href="">List item</a></li>
<li><a href="">List item</a></li>
</ol>
CSS
ol {
    counter-reset: li; /* Initiate a counter */
    list-style: none; /* Remove default numbering */
    *list-style: decimal; /* Keep using default numbering for IE6/7 */
    font: 15px 'trebuchet MS', 'lucida sans';
    padding: 0;
    margin-bottom: 4em;
    text-shadow: 0 1px 0 rgba(255,255,255,.5);
}

ol ol {
    margin: 0 0 0 2em; /* Add some left margin for inner lists */
}
.rectangle-list a{
    position: relative;
    display: block;
    padding: .4em .4em .4em .8em;
    *padding: .4em;
    margin: .5em 0 .5em 2.5em;
    background: #ddd;
    color: #444;
    text-decoration: none;
    transition: all .3s ease-out;
}

.rectangle-list a:hover{
    background: #eee;
}

.rectangle-list a:before{
    content: counter(li);
    counter-increment: li;
    position: absolute;
    left: -2.5em;
    top: 50%;
    margin-top: -1em;
    background: #fa8072;
    height: 2em;
    width: 2em;
    line-height: 2em;
    text-align: center;
    font-weight: bold;
}

.rectangle-list a:after{
    position: absolute;
    content: '';
    border: .5em solid transparent;
    left: -1em;
    top: 50%;
    margin-top: -.5em;
    transition: all .3s ease-out;
}

.rectangle-list a:hover:after{
    left: -.5em;
    border-left-color: #fa8072;
}
CSSを使ったテクニックはどこまで進化するんでしょう?
Speech Bubbles Without Images
次のような吹き出しも下記のようなシンプルなマークアップで実現出来ます。
サンプル
HTML
<p class="speech">SitePoint Rocks!</p>
影もついてますね。

更に次のような、何かを考えてる風の吹き出しにも出来ます。
HTLM
<p class="bubble thought">I think…</p>

CSS
p.bubble
  {
  	position: relative;
  	width: 200px;
  	height: 100px;
  	text-align: center;
  	line-height: 100px;
  	margin: 60px auto;
  	background-color: #fff;
  	border: 8px solid #666;
  	-webkit-border-radius: 30px;
  	-moz-border-radius: 30px;
  	border-radius: 30px;
  	-webkit-box-shadow: 2px 2px 4px #888;
  	-moz-box-shadow: 2px 2px 4px #888;
  	box-shadow: 2px 2px 4px #888;
  }

  p.thought
  {
  	width: 130px;
  	line-height: 100px;
  	-webkit-border-radius: 108px;
  	-moz-border-radius: 108px;
  	border-radius: 108px;
  }

  p.bubble:before, p.bubble:after
  {
  	content: ' ';
  	position: absolute;
  	width: 0;
  	height: 0;
  }

  p.speech:before
  {
  	left: 30px;
  	top: 100px;
  	border: 25px solid;
  	border-color: #666 transparent transparent #666;
  }

  p.speech:after
  {
  	left: 38px;
  	top: 100px;
  	border: 15px solid;
  	border-color: #fff transparent transparent #fff;
  }

  p.thought:before, p.thought:after
  {
  	left: 10px;
  	top: 70px;
  	width: 40px;
  	height: 40px;
  	background-color: #fff;
  	border: 8px solid #666;
  	-webkit-border-radius: 28px;
  	-moz-border-radius: 28px;
  	border-radius: 28px;
  }

  p.thought:after
  {
  	width: 20px;
  	height: 20px;
  	left: 5px;
  	top: 100px;
  	-webkit-border-radius: 18px;
  	-moz-border-radius: 18px;
  	border-radius: 18px;
  }
角丸だけなら border-radiusで簡単に実現できそうですが、角のとんがったやつはちょっとしたハックを使っています。
border プロパティで枠線を設定し、左と上の線のみに色をつけることで三角形にしてます。それを2枚重ねることでとんがった部分を実現しているという。


マークアップが綺麗になるのが何より嬉しいですね。CSS3最高ですね。
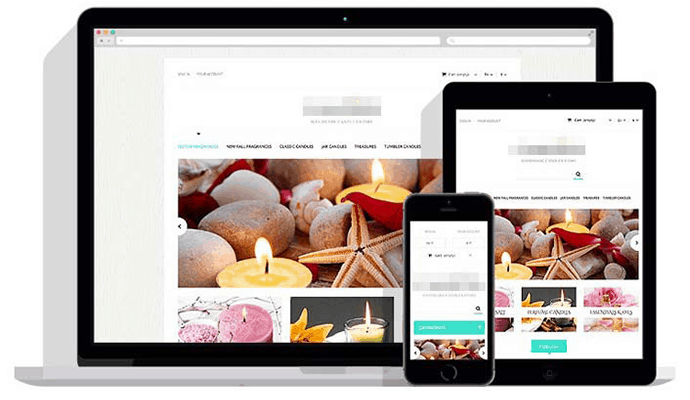
また、フルスクリーン背景がスライドショーになるCSS3を見つけました。
ページ全体の背景がCSS3によってアニメーションされ切り替わるサンプルとチュートリアルが公開されています。
画像・文字が綺麗にクロスフェードしながら切り替わってなかなかカッコいいものがCSS3をベースに構築されていて勉強になりつつ、そのまま使えそうですね。
ISDNの時代などはページ全体を背景にすることはタブーでしたが回線の高速化で珍しくなくなりましたね。
今後、よりPCのスペックがあがり回線環境がよくなることで未来はもっともっとリッチになっていきそうですね。
もっと詳しく知りたい方は下記をご覧ください。
http://red-team-design.com/css3-ordered-list-styles/